👀 JSP + thymeleaf
- controller
@GetMapping("/datalist2.do")
public String datalist2(Model m) {
    m.addAttribute("view","JSP & JSTL");

    return "datalist2"; // 걍 null로 해도 되는듯
}
- datalist2.jsp
/*<%@ page language="java" contentType="text/html; charset=UTF-8"
    pageEncoding="UTF-8"%> */이걸 지워줘야함
<!DOCTYPE html>
<html lang="ko" xmlns:th="https://www.thymeleaf.org">
<head>
<meta charset="UTF-8">
<title>JSP + thymeleaf</title>
</head>
<body>
<span th:text="${view}"></span>
</body>
</html>
✅
view 파일 속성명을
html과 jsp 함께 사용시 상위 속성을 입력해야함!
application.properties
여기에
spring.thymeleaf.cache=false
spring.thymeleaf.check-template-location=true
spring.thymeleaf.enabled=true
spring.thymeleaf.prefix=classpath:/templates/

# 요건 jsp 주의
spring.thymeleaf.suffix=.jsp

spring.thymeleaf.mode=html
요렇게 변경하면 jsp는 나오나 (단, 파일 최상단 jsp 부분은 삭제해야함 ) html은 깨짐
=> html의 controller에 return 값을 지정
return "datalist.html";
👀 JSP와 JSTL 로 view에 데이터를 출력하는 방식
application.properties
spring.thymeleaf.cache=false
spring.thymeleaf.check-template-location=true
spring.thymeleaf.enabled=true
spring.thymeleaf.prefix=classpath:/templates/


# 위의 spring.mvc.view.prefix , suffix부분이 불능 됨 => 요걸 해결해야 view안의 파일도 실행됨
spring.thymeleaf.suffix=.jsp
spring.thymeleaf.mode=html


🔽🔽🔽 요거 추가 🔽🔽🔽

#해당 view-names는 thymeleaf와 JSP&JSTL을 구분하기 위함
spring.thymeleaf.view-names=/*
- Controller
@GetMapping("/datalist3.do")
public String datalist3(Model m,ServletRequest req) {
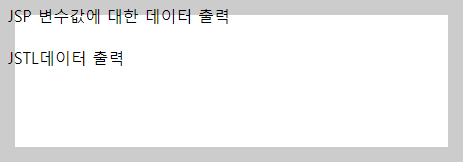
    req.setAttribute("data", "JSP 변수값에 대한 데이터 출력");
    m.addAttribute("view2","JSTL데이터 출력");

    return null;
}
- /WEB-INF/views/datalist.jsp 추가함
이거랑 앞 datalist1, datalist2 다 나와야함 !!!
<%@ page language="java" contentType="text/html; charset=UTF-8"
    pageEncoding="UTF-8"%>
<%
	String msg = (String)request.getAttribute("data");
%>
<!DOCTYPE html>
<html>
<head>
<meta charset="UTF-8">
<title>View(JSP 전용)</title>
</head>
<body>
	<%=msg%>
	<br><br>
	${view2}
</body>
</html>

👀 정리
templates 폴더 안의 view는 controller return (얘네만 신경 잘 쓰면됨 : 앞에 /)
return "/datalist.html";  //templates의 html파일
return "/datalist2"; //tehmplates의 jsp파일
views 폴더 안의 jsp view는 controller return
return "datalist3"; //views안의 jsp파일
// => 얘는 뭐 null 해도 되는듯
- return null 이면 spring mvc 찾음 => null X
🔽 🔽
최최최최종 application.properties
spring.application.name=bootweb

#Server
server.port=8081
spring.devtools.restart.enabled=true
server.servlet.encoding.force-response=true
server.servlet.encoding.charset=utf-8
server.servlet.encoding.enabled=true
server.servlet.encoding.force=true

#file I/O
spring.servlet.multipart.enabled=true
spring.servlet.multipart.max-file-size=4MB
spring.servlet.multipart.max-request-size=10MB

#view
spring.mvc.view.prefix=/WEB-INF/views/
spring.mvc.view.suffix=.jsp

#jdbc
spring.datasource.driver-class-name=com.mysql.cj.jdbc.Driver
spring.datasource.jdbc-url=jdbc:mysql://localhost:3306/cms
spring.datasource.username=hana
spring.datasource.password=hana1234

#mybatis (mybatis 사용시에만 패키지 추가)
mybatis.type-aliases-package=kr.co.sen,kr.co.web
mybatis.mapper-locations=classpath:/mapper/*.xml

#thymeleaf
spring.thymeleaf.cache=false
spring.thymeleaf.check-template-location=true
spring.thymeleaf.enabled=true
spring.thymeleaf.prefix=classpath:/templates/
spring.thymeleaf.suffix=.jsp
spring.thymeleaf.mode=html
spring.thymeleaf.view-names=/*
=> view-names : thymeleaf와 JSP&JSTL을 구분하기 위함
'CLASS > SPRINGBOOT' 카테고리의 다른 글
| #6-2 / thymeleaf - 협업시 properties 분리 (0) | 2024.08.21 |
|---|---|
| #6-1 / Thymeleaf 외부파일 로드 , layout (0) | 2024.08.21 |
| #5-1 / thymeleaf로 데이터 출력 1 : text , ArrayList , Map , dao, 조건문 , checked (0) | 2024.08.20 |
| #4-2 / Bootstrap - 회원가입 (0) | 2024.08.19 |
| #4-1 / Spring boot - 파일 업로드 (0) | 2024.08.19 |